Last updated on June 20th, 2025 at 04:04 am
We have seen how to configure system and eclipse in configuration part 1 and configuration part 2 posts to generate Selenium webdriver HTML test report. Now we have a test case and build.xml file in our project tree. Let me describe you few steps of configuring and running build.xml file in eclipse. Now follow the bellow given build.xml file configuration steps to generate HTML report.
Step 1 : Verify build.xml file work space
Open External Tools Configuration dialog as bellow
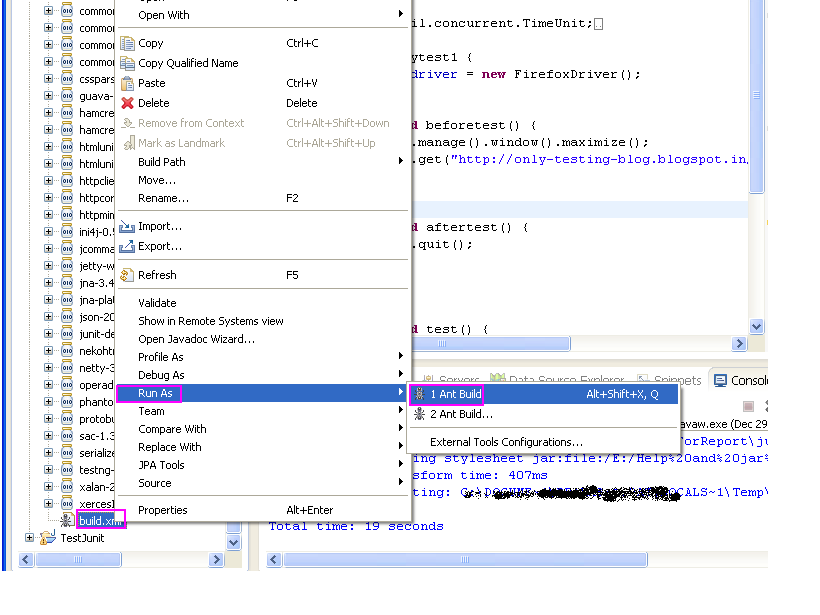
Right click on Build.xml – > Run As -> External Tools Configuration. It will open External Tools Configuration dialog as shown bellow.

In Main tab, you need to verify that your current project’s build.xml is selected or not.My current project name is “JUnitReport” so it is correct for me. If it is of any other project then you need to change it by clicking on Browse Workspace button.
Step 2 : Set target execution order
Go to the target tab and then set target execution order = build, ForReport (My Project name), junitreport. If it is not in this order then you can change it by unchecking and checking and the check box or by clicking on order button. So now my target execution order will looks like bellow.

Step 3 : Set Runtime JRE
Go to JRE tab. Here you need to set Runtime JRE = JDK at place of JRE as shown in bellow image.

If JDK is not display in Separate JRE list then you can add it by
– Click on Installed JREs button. It will open Preferences dialog.
– Click on Add button from Preferences dialog. It will open Add JRE dialog.
– Select Standard VM from Add JRE dialog and click on next button as shown in bellow image.

On Next window, Select JDK folder path(Which is located at C:Program FilesJava in my system) In JRE home field and click on Finish button. It will add JDK option in Separate JRE drop down.

Now build file configuration is finished and finally you are ready to run your build.xml file and generate your test report.
Step 4 : Run build.xml
Now you can run build.xml file in 3 ways.
1st way : Run from External Tools Configuration dialog as shown.

2nd way : Run directly from build.xml file
3rd way : Run from Menu icons

Step 5 : View Report
When you run build.xml file, eclipse will run your junit test case and on completion of execution report file will be generated in your junit folder which is located in your project folder as bellow.

Open index.html file. It will looks like bellow.


21 thoughts on “Generate webdriver test report in HTML by running build xml file : Part – 3”
nice tutorial.. was really helpful 🙂 thanks 🙂
Hi,
Wonderful tutorial,
I have a doubt, While executing a Ant built in webdriver, i am unable to give input for the process, it executes faster &immediately comes out & tells failed.
Kindly help:)
Hi,
It is really helpful for those who is new to webdriver.
Doubt:
Atlast in Junit folder there is no index.html
and also i cant give input during runtime.
Do the needful
Hello,
Thank you for your tutorial, it's very helpfull.
Instead of the junit class you put in the targets of your runconfiguration, I put a java class which launch a junit test case (using this : JUnitCore.runClasses(TestCase_Model.class);) but unfortunately I don't have the results of my TestCase_Model junit class…
I'm doing this because I'm developping a keyword driven framework and I'd like to call a junit test from a classic java class, and I'd like to see the reports of this junit test.
Do you think it's possible ? 🙂
Thank you for your tutorial. It was very helpful.
Hi,
It is really helpful for those who is new to webdriver.
Doubt:
Atlast in Junit folder there is no index.html
and also i cant give input during runtime.
Do the needful
how to select value from two drop down lists which are depends on each other.ex :country drop downlist, state drop downlist.whenever i am selecting value from country drop downlist, then state drop downlist will show the states after selecting.
Hi, where should i specify the path for Reports folder?
Hi I am not getting the forreport option in – Build.xml – > Run As -> External Tools Configuration – > Targets
Please help.
Hi I am also not getting the forreport and junitreport options in – Build.xml – > Run As -> External Tools Configuration – > Targets
can you please replay for that as soon as possible.
Thanks in advance
Hi, I am also not getting the forreport and Junit report options in – Build.xml – > Run As -> External Tools Configuration – > Targets
please reply a answer as soon as possible..
Thanks in Advance
Love your detailed step by step configuration.
Thanks a lot!!
Hi
IS ther any one to reply am in hurry for the results.
Am not getting the report generated index.html
Please help
Hi, Thanks for the detailed description on the steps. But I am not seeing any index.html file generated at the end. On console, I see the following warning: build-project:
[echo] Proj1: C:umaseleniumProj1build.xml
[javac] C:umaseleniumProj1build.xml:78: warning: 'includeantruntime' was not set, defaulting to build.sysclasspath=last; set to false for repeatable builds
build:
is it realted to the generation of the file. Please respond.
Thank you Aravind, I am able to generate reports by running build.xml.
Excellent blog, this helps allot for a beginner like me..
Once again thanks
Same for me.
Hi,
It is really helpful.
Doubt:
Atlast in Junit folder there is no index.html
On console, it is showing 'Build Successful' message.
Step 2 : Set target execution order
I don't have "ForReport" option, I only have 1st and 3rd option.
#1. Is that going to cause an error? How do I add 'ForReport' otherwise.
#2. I followed all the steps and when I ran the test using Ant. I got "BUILD FAILED"
C:SeleniumWorkspaceabcdbuild.xml:112: C:SeleniumWorkspaceabcdFrameworkjunit does not exist
I am not sure why this is complaining.
Excellent. It working for me! Thanks for the tutorial…
Hi Aravind,
I am getting this error while running build.xml.
Buildfile: C:UsersarvijayaworkspacejunitProjectbuild.xml
build-subprojects:
init:
build-project:
[echo] junitProject: C:UsersarvijayaworkspacejunitProjectbuild.xml
build:
junitreport:
BUILD FAILED
C:UsersarvijayaworkspacejunitProjectbuild.xml:123: C:UsersarvijayaworkspacejunitProjectjunitPack does not exist.
Total time: 360 milliseconds